Conversations
Building a WhatsApp bot without coding: A step-by-step guide

Conversations
Is building a WhatsApp bot without coding skills possible? We’ll start with the good news: you don’t need coding skills to build your own WhatsApp bot! In this step-by-step guide, we’ll show you how it works!
In today’s fast-paced digital world, WhatsApp has become a prominent platform for businesses to engage with their customers. One powerful tool for enhancing customer interactions on WhatsApp is a chatbot. The good news is, you don’t need coding skills to build your own WhatsApp bot. In this comprehensive guide, we’ll walk you through the step-by-step process of creating a WhatsApp bot that requires zero programming skills.
Whether you want to start from scratch or use a template, we’ve got you covered.
Before setting up a WhatsApp bot, you need to get access to the WhatsApp Business Platform (API). That’s the only platform that supports WhatsApp chatbots for companies. The WhatsApp Business app doesn’t support bots!
💡Getting started with a WhatsApp bot: Everything you need to know!
The easiest way to get access to the API is through a WhatsApp Business Solution Provider (BSP) such as Sinch Engage. BSPs are official Meta partners that are allowed and verified to offer WhatsApp business solutions.
Once you sign up with a platform like Sinch Engage, you can immediately get started on building your WhatsApp chatbot.
There are two ways to build a WhatsApp bot without coding on Sinch Engage, building it from scratch, and using a template. We’ll walk you first through the process where you set up your own bot from scratch. Try Sinch Engage for free
Once you’ve logged into your Sinch Engage account, navigate to the main menu and select “Chatbot.” If you don’t have a bot yet, you’ll see the options to:
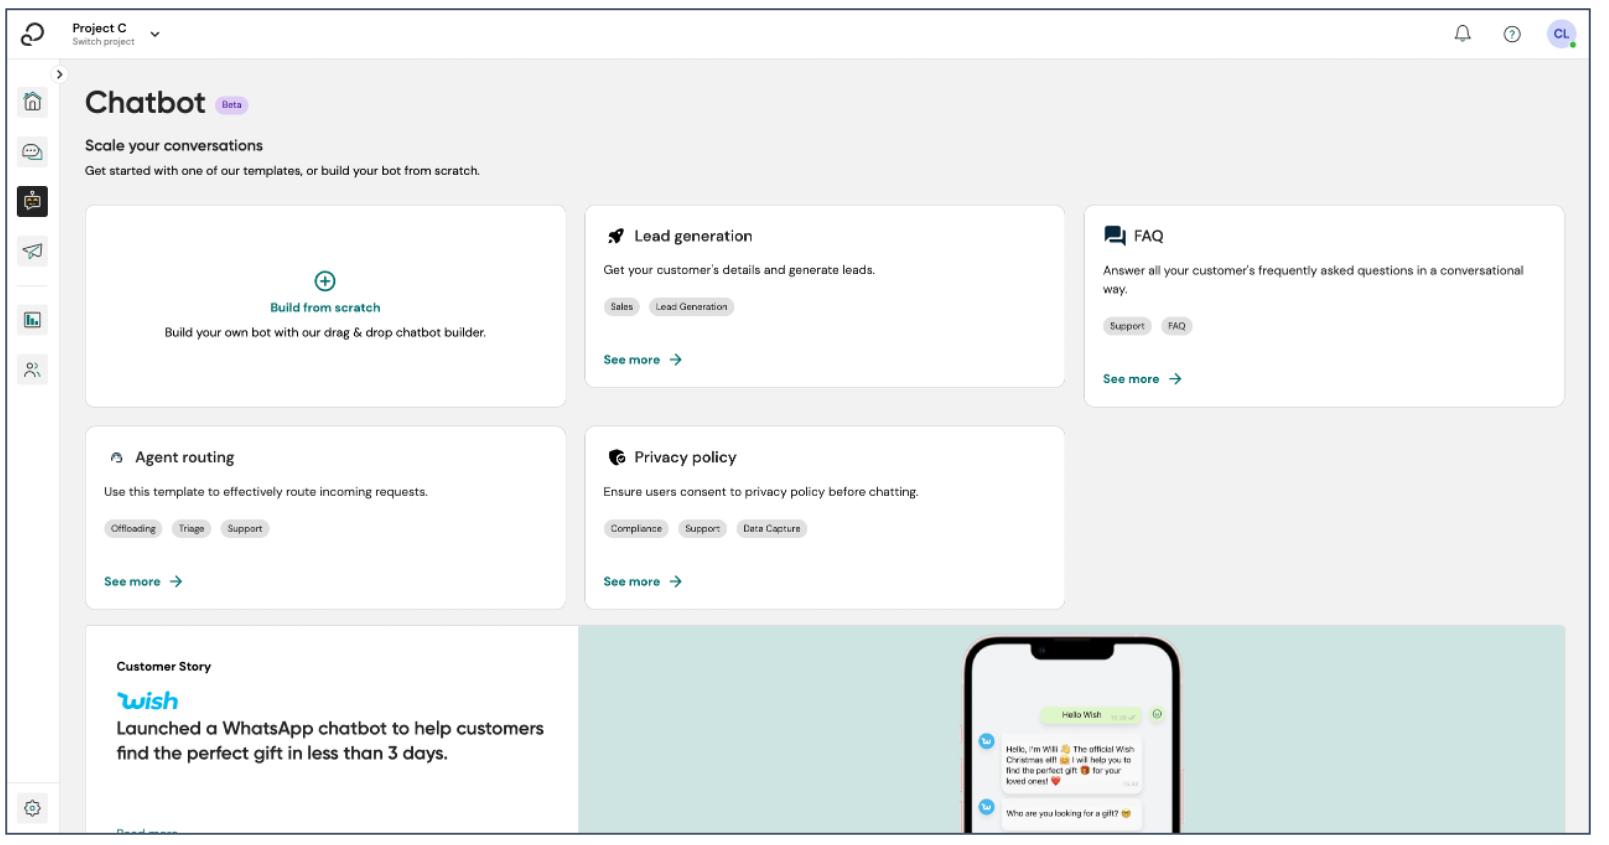
If you’re feeling creative and want to craft a unique WhatsApp bot, click on “Build from scratch.” This option allows you to start with a blank canvas and build your bot from the ground up. And it only takes a few minutes!
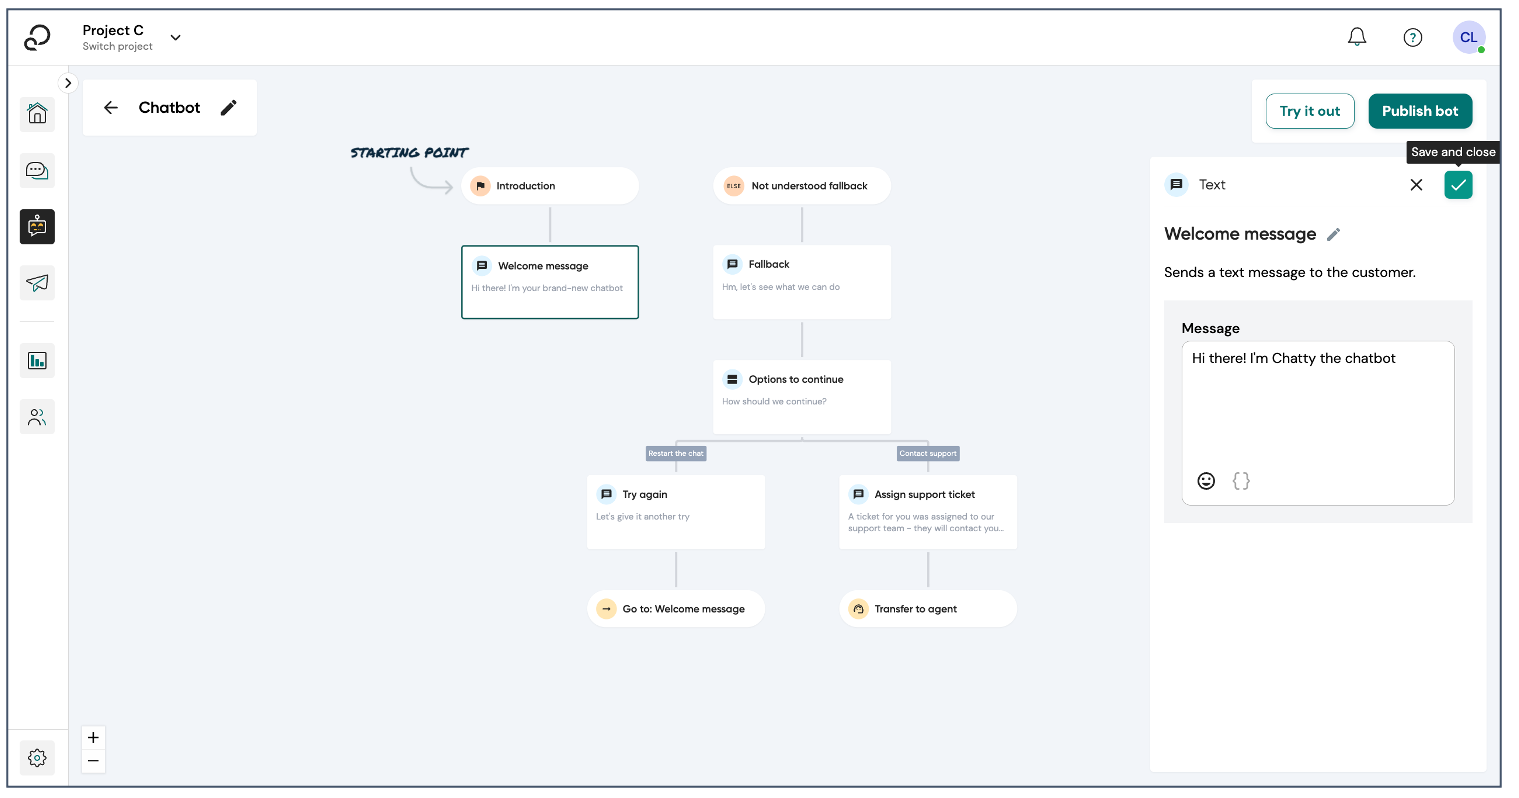
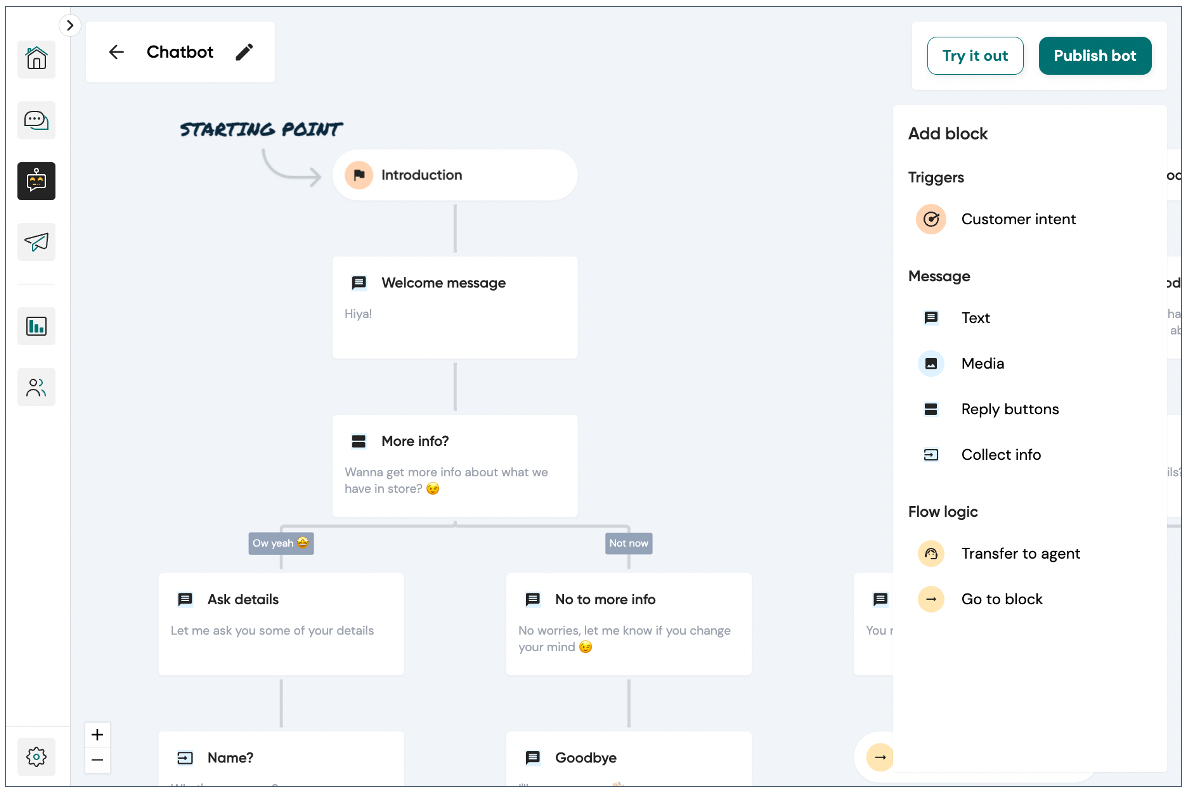
Simply select the “build from scratch” option at the top. Now, the bot canvas opens: this is your playground to build your bot. The middle of the screen displays the current set-up of your bot. The text in the Welcome Message block is what will be shown as the first message to all users of the bot. On the right are the different blocks that you can drag and drop to your bot.
The welcome message is the first thing users will see when they interact with your WhatsApp bot. To edit this message, click on the “Welcome Message” block on the canvas. In the message field, type the greeting or introduction you want your users to receive. Once you’re satisfied, click the checkmark icon in the top right corner to save your changes.
Now comes the fun part – adding functionality to your bot. On the right side of the canvas, you’ll find various blocks that you can drag and drop onto your bot. For example, you can add “Reply buttons” to provide users with options to choose from.
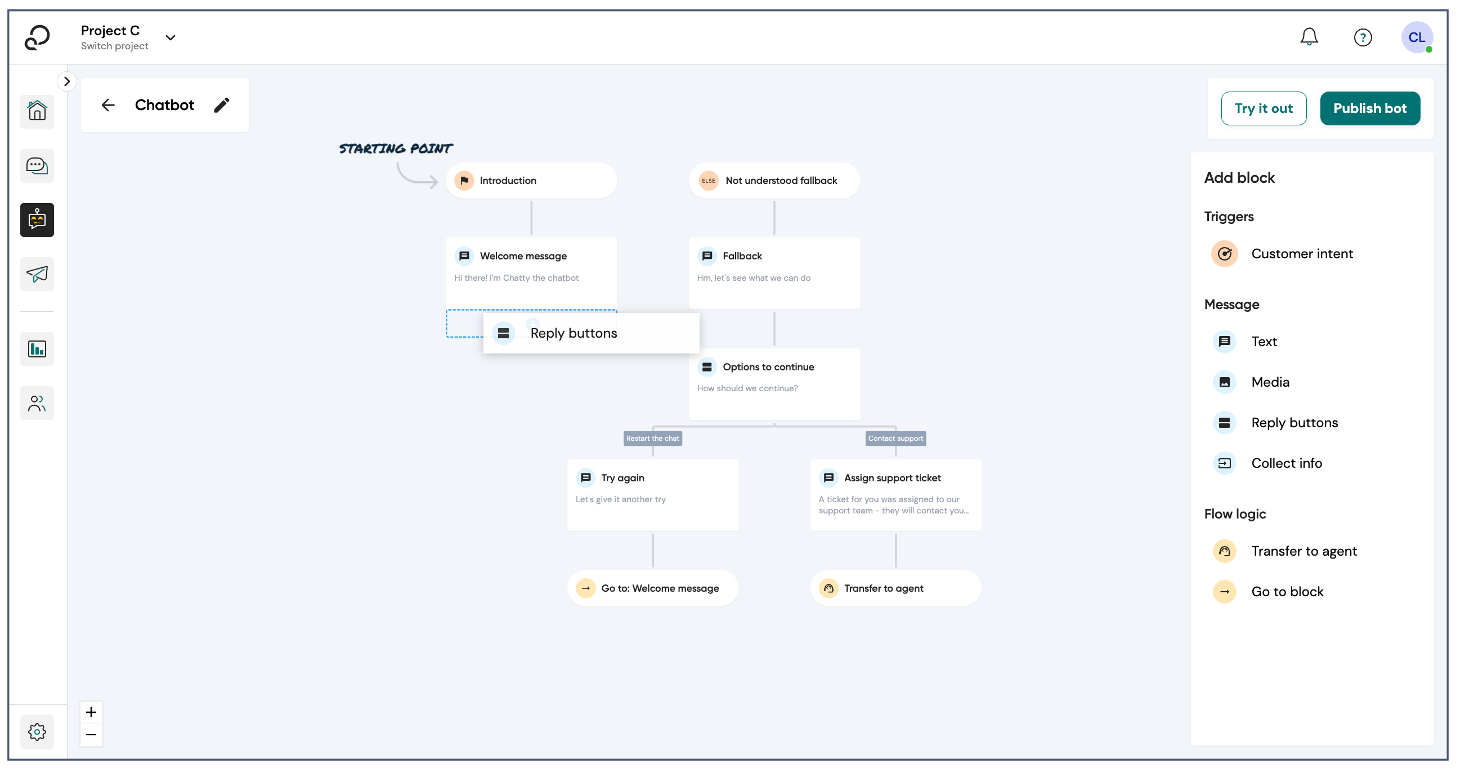
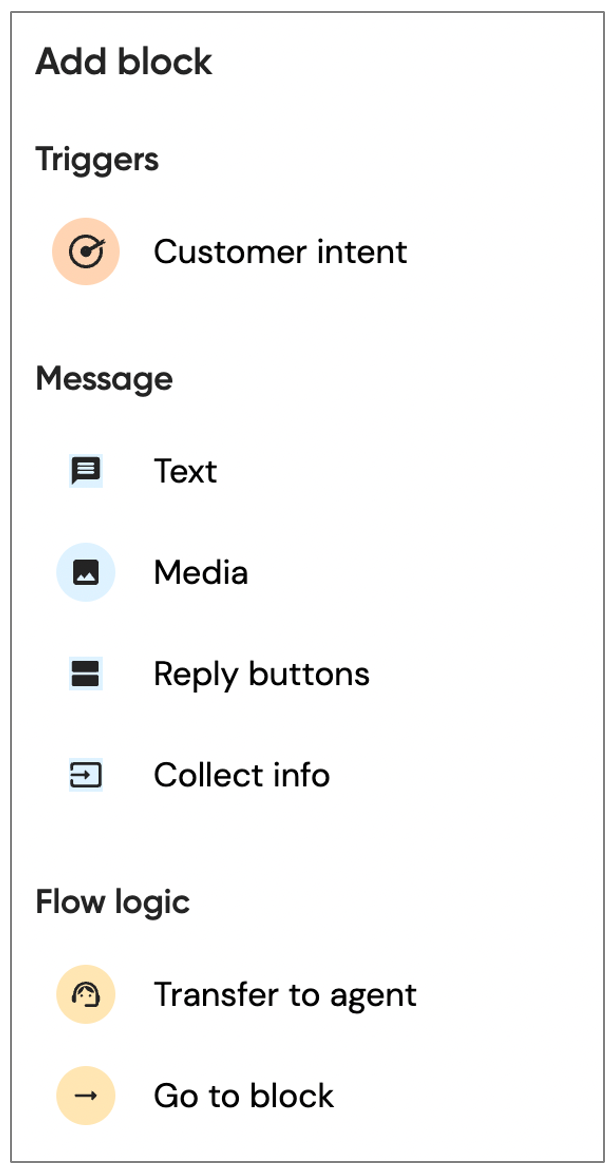
With your welcome message and blocks in place, you can start crafting the conversation flow for your bot. Click on each block to customize the messages and responses. On your right-hand side, you’ll see the Add block panel from which you can drag and drop blocks of conversation flow onto the bot canvas. The blocks are divided into categories:
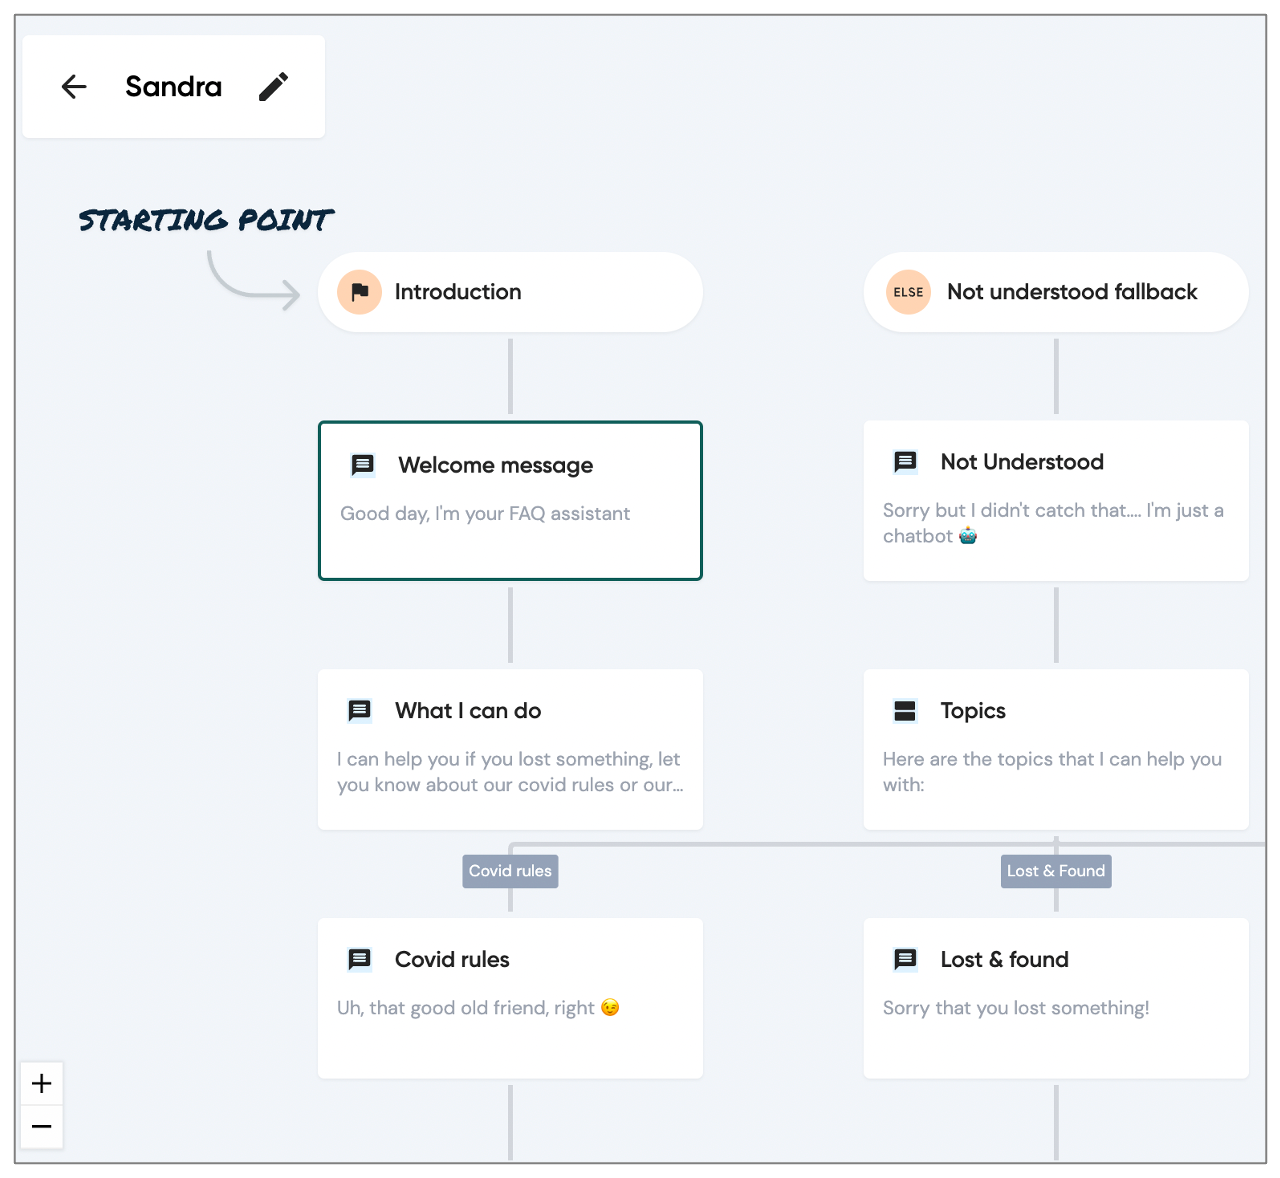
In the center of the screen, the bot canvas shows you the conversation flow already created in your bot with the blocks added. You can modify the blocks if needed by clicking on them.

By the way, you can also edit the name of your bot. In the example above, it’s called “Sandra”, but you can change the name by clicking on it.
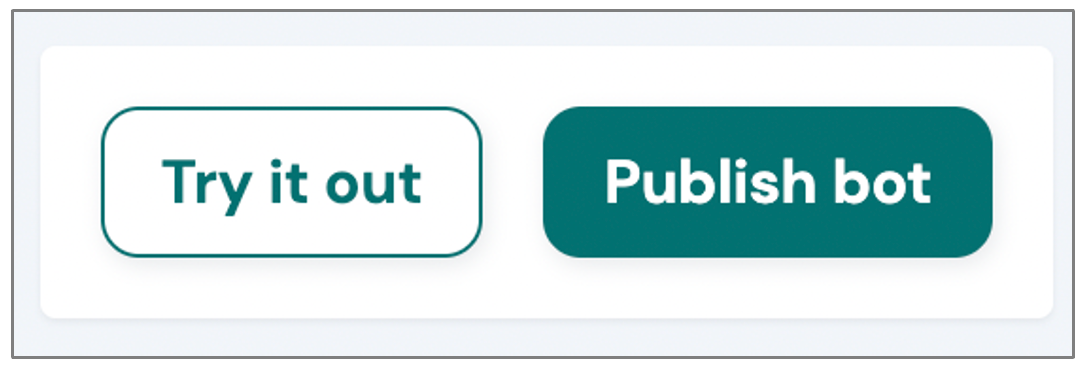
Once you’re happy with your flow, you can first try it out to make sure it works correctly, and then publish it.
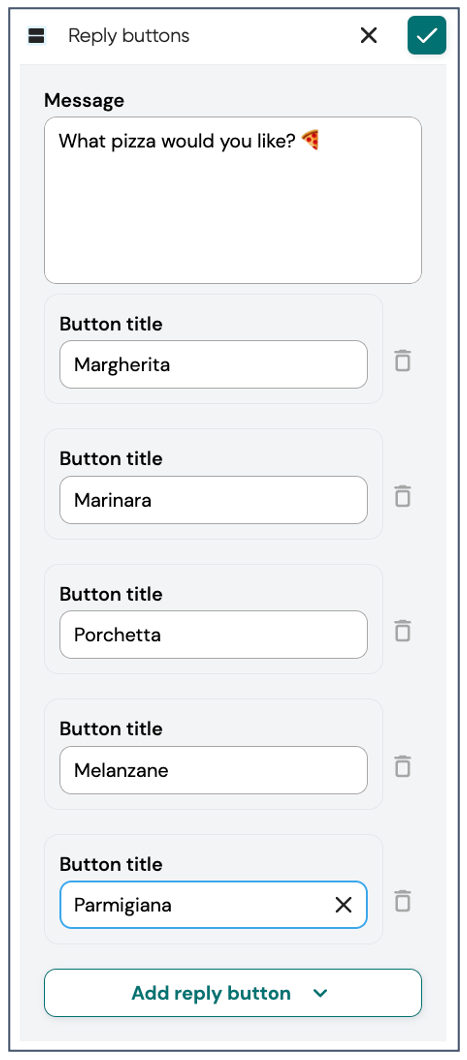
WhatsApp offers multiple interactive messages, including list messages. List messages are a menu of up to ten options from which users can make a selection. On Sinch Engage, you can add list messages to your chatbot by using multiple buttons inside Reply buttons.

Open the Reply buttons block to edit it. In this example, our bot helps customers to choose a pizza to order.
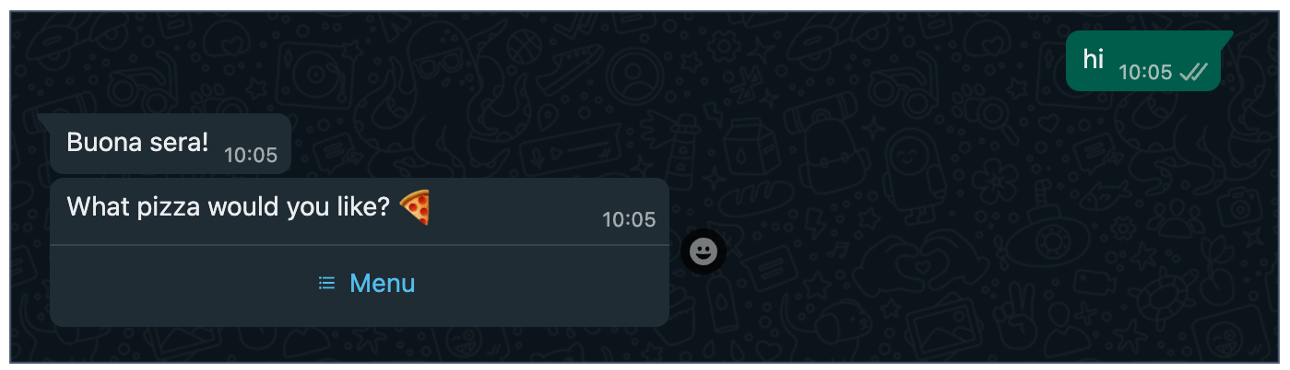
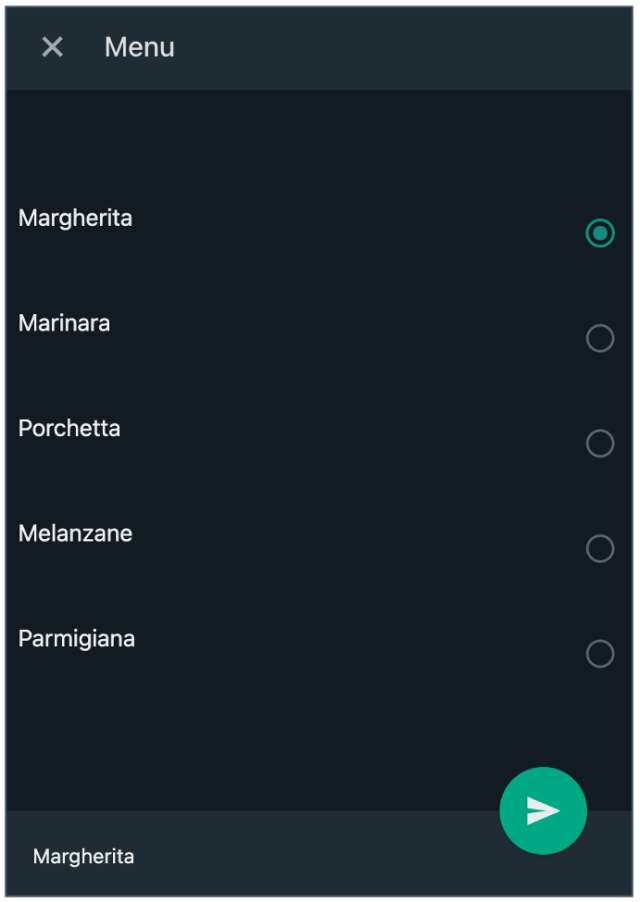
Not that the list of buttons is hidden under Menu.
Once you’ve designed your WhatsApp bot’s conversation flow, it’s time to integrate it with WhatsApp. Sinch Engage streamlines this process, ensuring that your bot can communicate seamlessly with WhatsApp users.
Before deploying your bot to a live audience, it’s crucial to thoroughly test it. Sinch Engage provides testing features that allow you to interact with your bot and identify any issues that need fixing.
With successful testing, you’re ready to deploy your WhatsApp bot.
After deployment, keep a close eye on your bot’s performance. Sinch Engage offers robust analytics tools that provide valuable insights into user interactions. Use this data to refine your bot’s responses and optimize its effectiveness over time.
If you prefer an even quicker start, Sinch Engage offers a range of templates for various use cases.
From the main menu, select “Chatbot” and explore the available templates displayed as individual tiles that are displayed on the right of and below the “build from scratch” option.
Select “Use template” to load the chosen template onto the canvas.
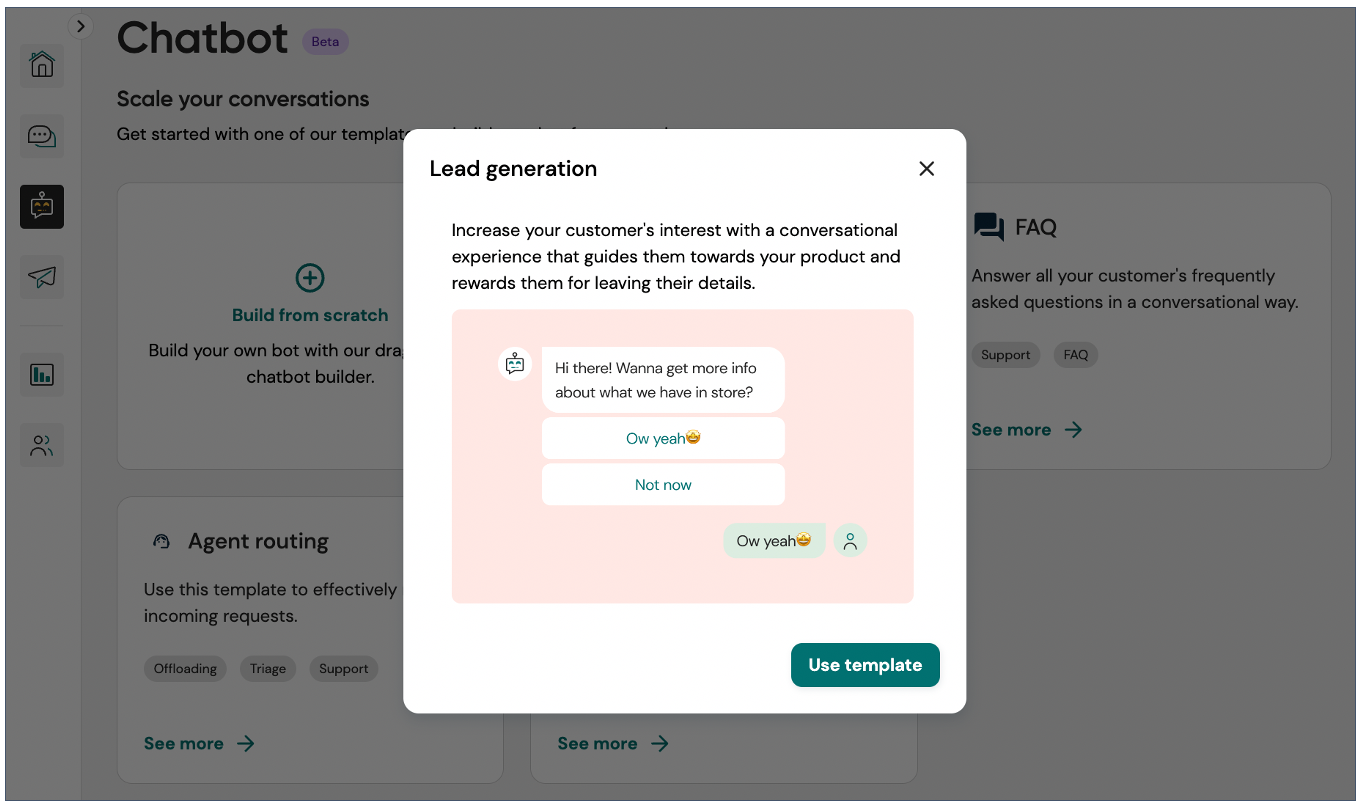
Once loaded, you can either use it as-is and publish your chatbot immediately or customize it to align with your specific business requirements.
Building a WhatsApp bot without coding skills is an achievable goal, thanks to user-friendly platforms like Sinch Engage.
Whether you decide to start from scratch and design a unique bot or use a template as a foundation, you have the power to create a valuable tool for your business.
And if you think that you need a WhatsApp bot with more advanced capabilities, you can easily upgrade to an AI-based chatbot as well.

Author: