Resources
How to send or automate a text message from NetSuite in under 10 minutes
If you’re already using NetSuite to run parts of your business operations, there are many moments in the customer journey where your team needs to take urgent action – like orders shipping out, failed payments, delayed deliveries, etc. And sure, you can address these issues with a customer email, but we all know emails are easy to ignore.
Instead of relying only on email to communicate with customers, there’s also SMS in NetSuite.
With the right setup and NetSuite SMS integration, you can send and automate text messages directly from your NetSuite workflows without any extra tools. This article will show you how.
What “sending a text from NetSuite” actually means in practice
There are two ways you can use SMS in NetSuite.
1. One-off SMS
When you see an order, invoice, shipment, or something that needs a bit of extra attention, you can send a quick, manual text via NetSuite right from that record.
This might be something like a:
- Polite nudge for an overdue invoice
- Heads-up to a customer with a high-value order on its way
- Quick update when something’s not going to plan
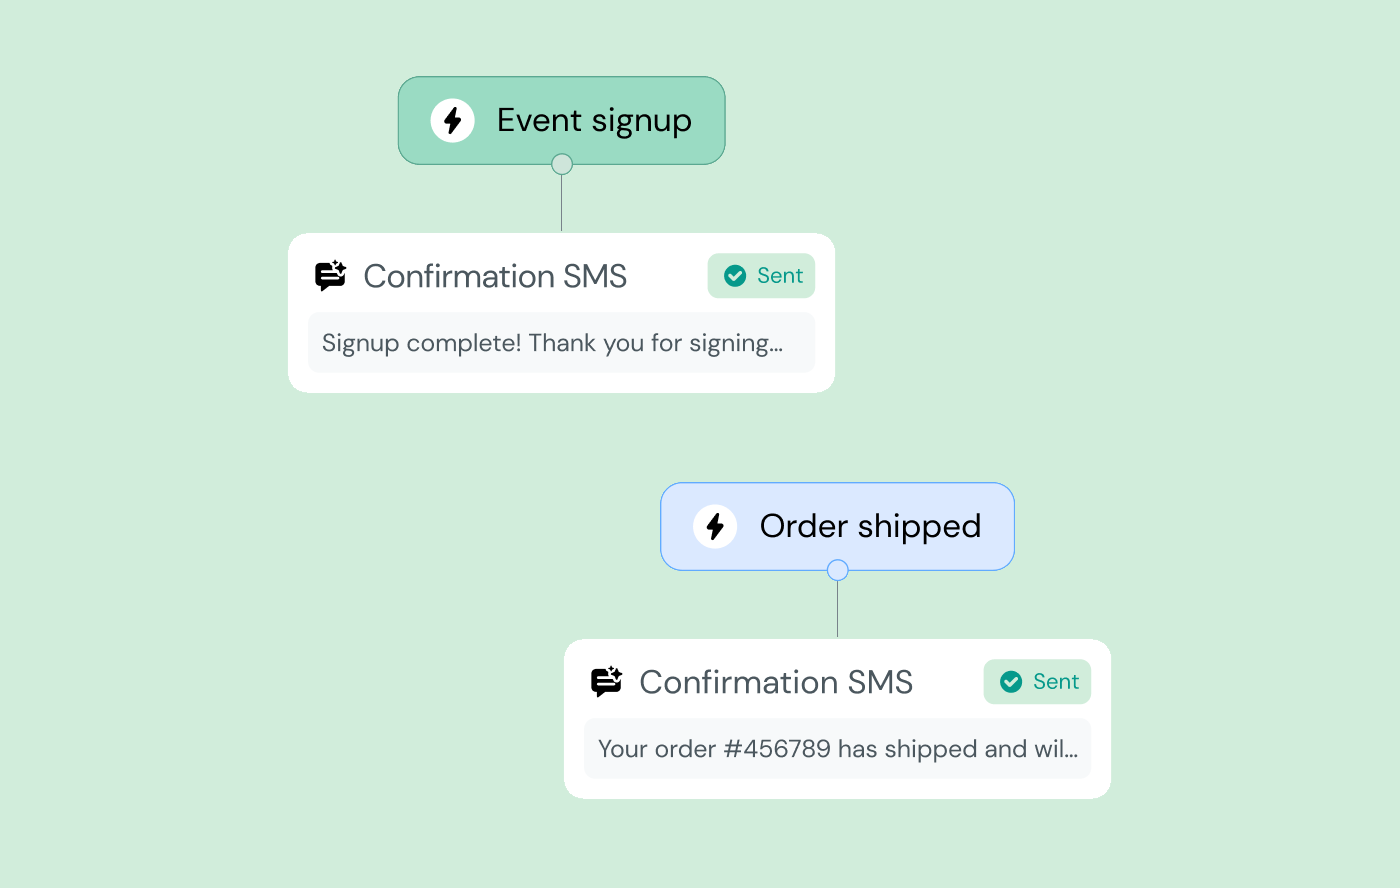
2. Automated SMS via NetSuite workflows
Automated texts are triggered by the same logic you already use in NetSuite.
That might be:
- A status change (e.g. an order has been shipped)
- A field update (e.g. a payment has failed)
- A time-based rule (e.g. an invoice is late)
Once someone triggers that logic, NetSuite automatically sends out a pre-defined text.
What you need before you start
First things first, you’ll need admin access to NetSuite.
Next, pick one clear use case to begin with. It’s a good idea to pick a single moment where a text would genuinely help (as above, it could be an overdue invoice or something time-sensitive).
You’ll also need a Sinch Engage account so NetSuite has somewhere to send messages through. You can easily integrate the two in the integrations section of Sinch Engage.

Connecting NetSuite to Sinch Engage
Sinch Engage is a native NetSuite integration (in fact, it’s one of the only native integrations), which means it’s designed to live inside NetSuite in the interface users are already familiar with.
Here’s how it works:
- First, install the Sinch Engage integration directly in NetSuite. This makes SMS available as an action you can use across records and workflows.
- Next, authenticate your Sinch Engage account. This simply connects NetSuite to the platform that actually sends the message. Once this connection is in place, NetSuite automatically knows where to send SMS requests.
- You’ll then confirm SMS permissions and regions. Different countries have different rules around sender IDs, opt-outs, and message delivery. Sinch Engage handles most of this for you, but you need to confirm where you’re sending messages and how they should appear to recipients.
- Finally, validate your sender IDs or phone numbers. This is the name customers will see when they get a message from you. Sinch Engage can do it for you.
A quick word on compliance: SMS marketing comes with a few extra rules. Things like mandatory opt-outs, quiet hours, and regional requirements are baked into the integration, but you still need to choose the right settings for your business.
Once the connection is in place, you don’t have to touch it again.
Sending your first SMS from NetSuite
The first and easiest way to use NetSuite for texts is to use it to send one-off messages to individual customers.
Start by opening an existing record in NetSuite, such as a sales order, invoice, or support ticket. Now with the Sinch Engage integration is in place, you’ll be able to select “Send SMS”.
Then, write the message. The key is to keep it short and specific, for example:
- Hi Sarah, your order #048392 has shipped and is out for delivery today.”
- “Just a heads up that invoice #1027 is now overdue. Let us know if you need anything.”
- “Quick update: your support case has been escalated and we’re looking into it now.”
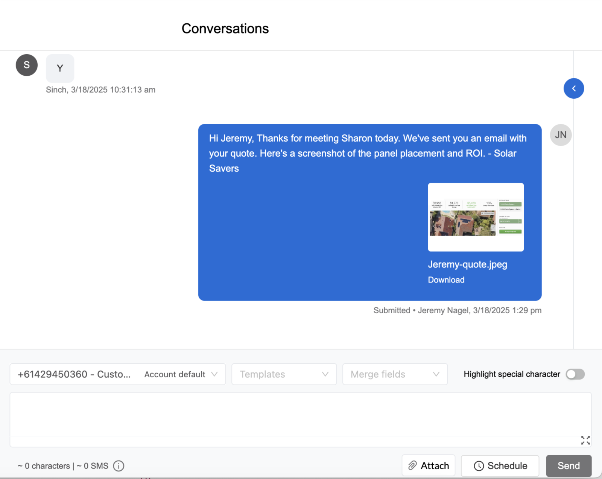
Before sending anything to a customer, send a test message to an internal phone number so you can see what it looks like on a real device.
Once sent, you can see and track the delivery status in NetSuite.
Automating SMS with NetSuite workflows
If you’ve ever built or edited a workflow in NetSuite before, this will feel familiar.
At a high level, sending an automated SMS works on an if/then format:
When X happens in NetSuite, send Y text message.
Those triggers can be the same ones you already use, like:
- An order status changes to shipped
- An invoice gets marked as overdue by a certain number of days
- A support case priority is set to high
When that condition is met, NetSuite triggers the workflow and Sinch Engage sends the SMS.
Let’s take a look at how you might build a workflow that sends an SMS triggered by an order status.
Start by creating a new workflow on the record type (most order updates start with Sales Order).
- Record type: sales order
- Event/trigger: depends on your setup, but generally you’re watching for a status change or a field update (e.g. “only send when the order hits this status”).
Then add entry conditions so it only runs when the status changes to “shipped”, for example.
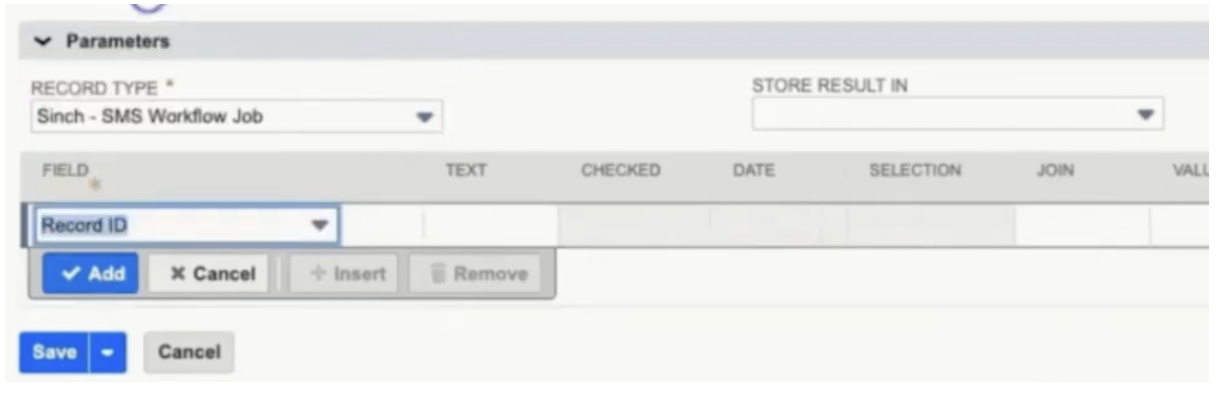
You can then create an SMS workflow job within the workflow, which links it to the SMS integration. This basically tells the workflow that when a record enters a certain state, it should create an SMS job and send a message.
In the SMS job setup, you can map which record the message relates to, who receives it, and what the message says.
Note that you can only select a message from your SMS Template Library when adding SMS messages to workflows. You can’t create a message ad-hoc in the workflow builder itself.

Here are some SMS templates you can use in NetSuite for various use cases.
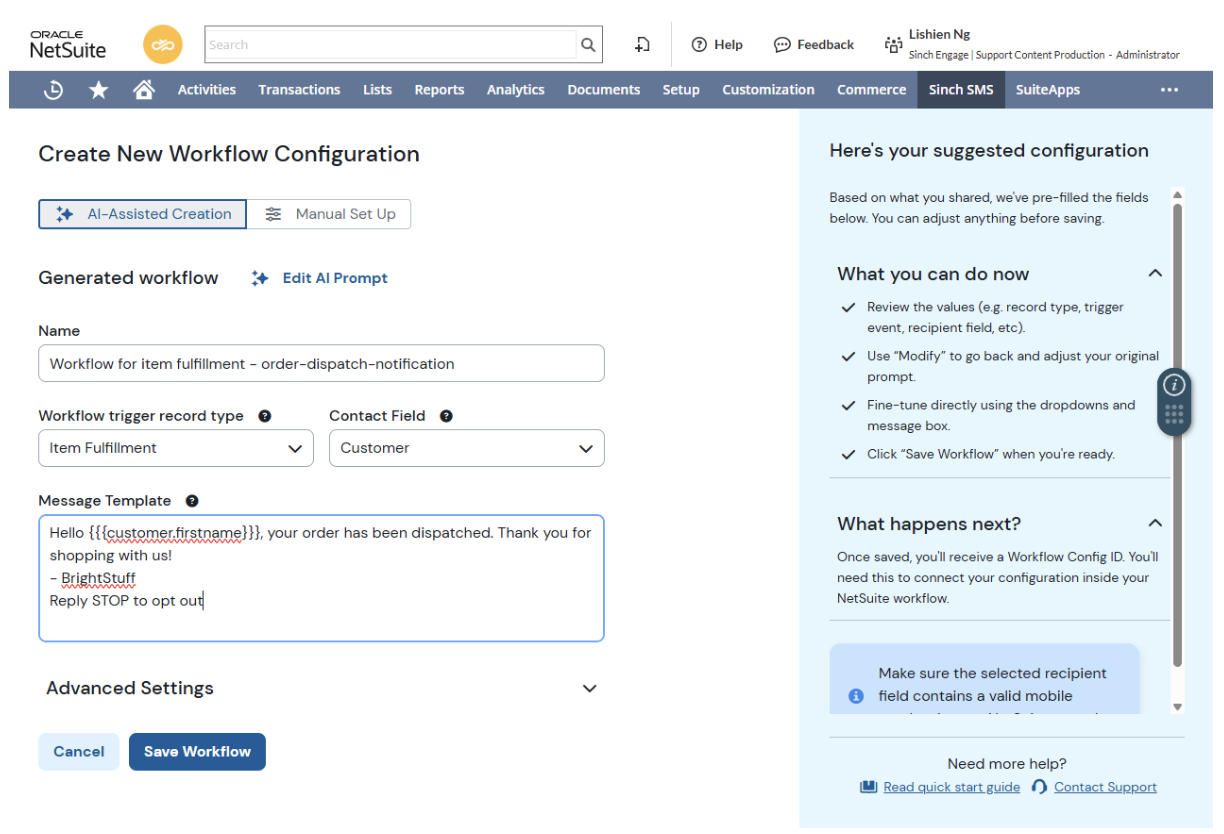
Using AI-powered SMS workflows to save setup time
The Sinch Engage NetSuite integration now has an AI-assisted workflow feature where you let it know what you’d like the workflow to do and AI will create it for you.
Here’s a quick overview:
And here’s a step-by-step breakdown of how to do it yourself:
Step 1: Start with a real scenario
Pick one use case, like order delays. It’s common, time-sensitive, and customers actually want the update.
Example goal: If an order is delayed, text the customer with a clear update and next step.
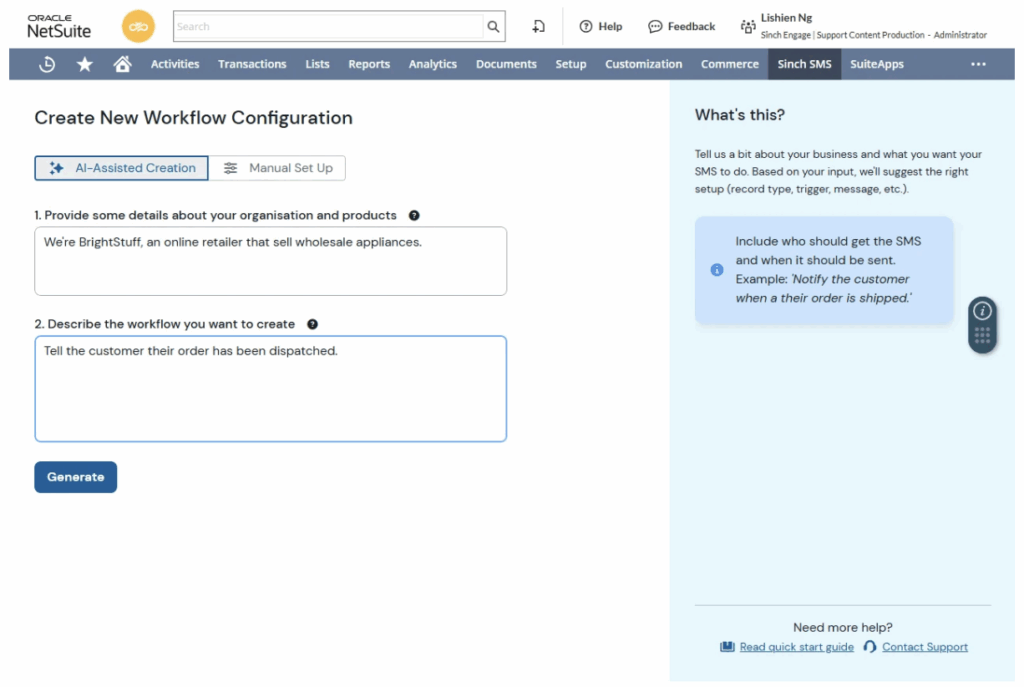
Step 2: Ask AI to build the workflow skeleton
Instead of manually piecing together triggers, conditions, and message copy, you prompt AI with what you want.
You’ll be asked to give some info about your organization and products, as well as a bit more detail about the workflow you want to create.
AI can then propose:
- The trigger (e.g. a status change to “Delayed” or a delay flag field update)
- The recipient (customer phone number on the order/customer record)
- The message (a short, sensible text that fits the situation)
Step 3: Let AI suggest message copy you’d actually send
Once you’ve added the extra info, just click Generate and AI will come up with the most appropriate workflow. It’ll also suggest message copy you can use.
You can tweak the tone of those messages, add your brand name, or tighten it up if you need.
Step 4: Check it all looks good
Before you publish the workflow, make sure the trigger is correct and all the information is right.
It’s a good idea again to test each workflow before you put it out into the wild. You can test in a sandbox or swap the recipient to an internal test number.
Then, trigger the condition once and check:
- The message sends
- The content looks okay on a phone
- It doesn’t re-send or glitch in any way
Best practices for automating SMS with NetSuite and Sinch Engage
- Start with one workflow. Pick a single record type and trigger. Make sure it fires once, sends the right message, and logs correctly on the record before you copy it for other statuses or teams.
- Keep SMS copy tight. The order number, case ID, or invoice already exists in NetSuite. Use that context instead of long explanations.
- Avoid automating edge cases that change often. NetSuite records can update multiple times in quick succession. Be careful with automating situations like cancellations, partial shipments, or escalations unless you add guardrails (e.g. a “SMS sent” checkbox) to make sure you don’t send unnecessary messages.
- Use NetSuite timing rules and Sinch Engage quiet hours together. Use workflow conditions (time-based rules) and Sinch Engage quiet-hour settings so messages don’t send overnight or at awkward times.
- Test workflows with internal numbers. Always point new SMS workflows to an internal phone number first. NetSuite workflows don’t warn you before sending real messages.
Your next steps
Ready to try SMS in NetSuite? Here are the next steps to take, depending on where you’re at:
- Explore the NetSuite integration to see exactly how SMS fits into the records and workflows you already use
- Get started with Sinch Engage if you’re ready to try it hands-on and send a few test messages
- Talk to our team if you have more complex workflows, multiple regions, or any other needs you have questions about – our experts are here to help!
Author: